

Introduction
Weather conditions can greatly affect the performance of electronic devices. When it comes to distance sensors, finding one that can withstand various weather conditions can be a challenge. This is where the MB7389 weather-resistant distance sensor comes in.
In this article, we will explore how to interface the “MB7389 Weather-Resistant Distance Sensor” with an Arduino board, allowing you to create weather-resistant distance sensing projects.
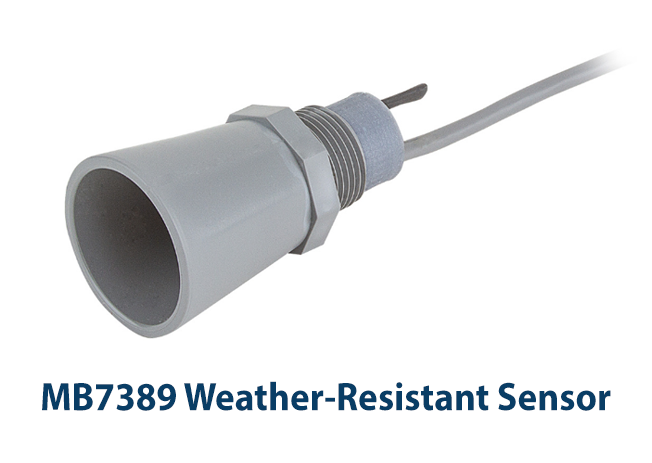
What is MB7389 Weather-Resistant Distance Sensor?
The MB7389 Weather-Resistant Distance Sensor is a type of ultrasonic sensor designed to measure distance in various weather conditions. It is made with weather-resistant housing that can withstand harsh environmental conditions such as rain, snow, and humidity. This makes it ideal for use in outdoor applications such as weather stations, robotics, and industrial automation.
Hardware Components
To interface an MB7389 Weather-Resistant Distance Sensor with Arduino, you’ll need the following hardware components to get started:
| Components | Value | Qty |
|---|---|---|
| Arduino UNO | – | 1 |
| USB Cable Type A to B | – | 1 |
| DC Power for Arduino | – | 1 |
| MaxBotix | MB7389 | 1 |
| Jumper Wires | – | 1 |
Installing Arduino IDE
First, you need to install Arduino IDE Software from its official website Arduino. Here is a simple step-by-step guide on “How to install Arduino IDE“.
MB7389 Arduino example code – Analog
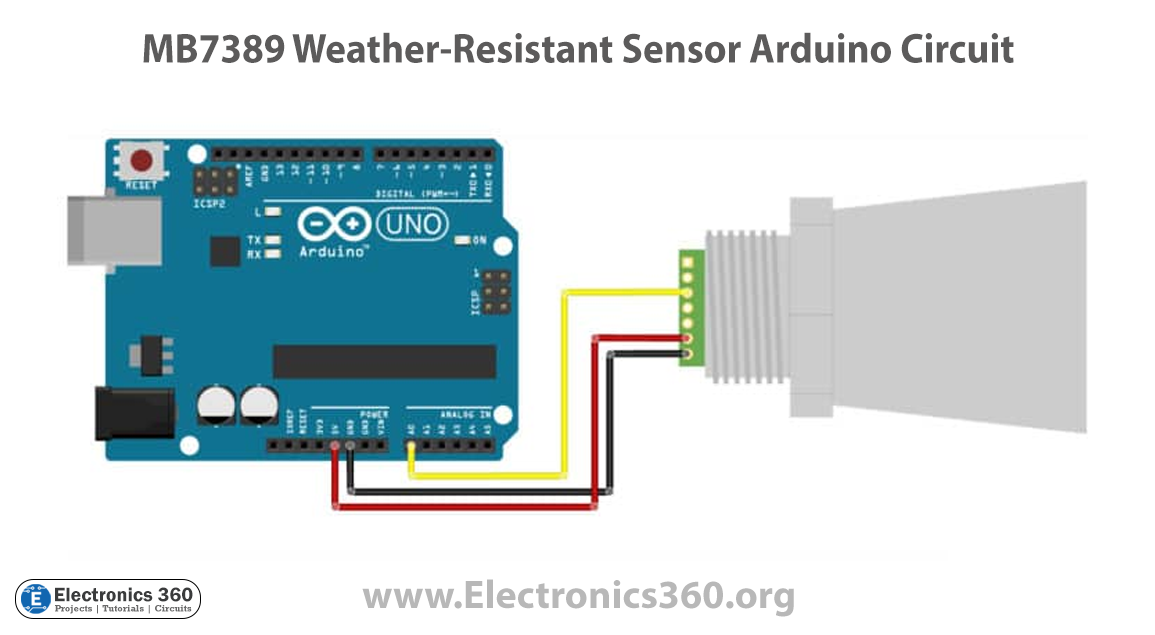
Now copy the following code and upload it to Arduino IDE Software.
#define sensorPin A0

int distance = 0;

void setup() {
  Serial.begin(9600);
}

void read_sensor() {
  distance = analogRead(sensorPin) * 5;
}

void print_data() {
  Serial.print("distance = ");
  Serial.print(distance);
  Serial.println(" mm");
}

void loop() {
  read_sensor();
  print_data();
  delay(1000);
}
Code Explanation
This Arduino code is a simple program that reads the value from an analog sensor connected to pin A0 of the Arduino board, calculates the distance based on that value, and displays the distance on the serial monitor.
The first line of the code defines the sensorPin as A0, which is the pin where the analog sensor is connected.
In the setup() function, Serial.begin(9600) initializes the serial communication with a baud rate of 9600, which is the standard speed used by the Arduino serial monitor.
The read_sensor() function reads the value from the analog sensor connected to sensorPin and multiplies it by 5 to convert it to millimeters.
The print_data() function displays the distance value on the serial monitor with a message “distance =” and “mm” indicating the units of measurement.
In the loop() function, the program reads the sensor, prints the distance on the serial monitor, and then waits for one second (1000 milliseconds) using the delay() function. This process is repeated indefinitely until the program is stopped or the board is reset.
MB7389 Arduino example code – Pulse width
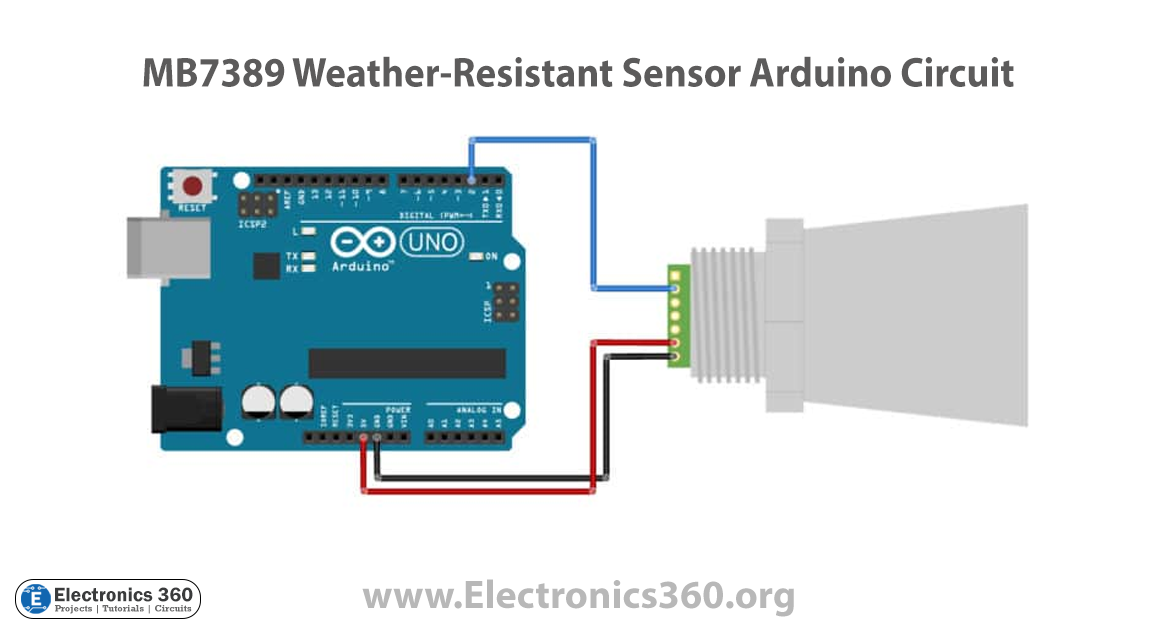
#define sensorPin 2

long distance = 0;
long duration = 0;

void setup() {
  pinMode(sensorPin, INPUT);
  Serial.begin(9600);
}

void read_sensor() {
  duration = pulseIn(sensorPin, HIGH);
  distance = duration;
}

void print_data() {
  Serial.print("distance = ");
  Serial.print(distance);
  Serial.println(" mm");
}

void loop() {
  read_sensor();
  print_data();
  delay(1000);
}
Applications
Here are some applications of the MB7389 Weather-Resistant Sensor:
- Outdoor weather monitoring
- Industrial automation
- Robotics
- Autonomous vehicles
- Security systems
- Proximity sensing
- Traffic monitoring
- Agriculture and farming
- Water level sensing
- Structural health monitoring of buildings and bridges
- Drone altitude sensing.
Conclusion
The MB7389 weather-resistant distance sensor with an Arduino opens up a world of possibilities for distance sensing projects. Whether you’re building a weather station or a robot that needs to navigate through different weather conditions, this sensor can provide accurate distance measurements while withstanding harsh weather conditions.

